Building a RESTful API Using ReactPHP: JWT Authentication
Previously we have used Basic HTTP Authentication to protect our RESTful API. This authentication method is pretty simple, but in most cases, it can be used only in the internal network with server-to-server communication. For example, we can’t store Basic Authentication credentials to mobile devices. JSON Web Tokens is another solution to protect our RESTful API. At this point, we have one resource defined on our API routes /users. Let’s create a guard-middleware to protect this resource. Also, we will create a new /authenticate route to authenticate a user and get a token. The user will store this token and send it with every request.

Getting Started
To be able to work with JWT we need to install a package firebase/php-jwt:
$ composer require firebase/php-jwtThis library will help us to encode/decode tokens.
Guard
We will create a guard system that protects specified routes and uses JWT to authenticate a user. We’ll start from the top, from the high-level class Guard and then step by step we will dig down into lower-level classes and details.
Now, when the request comes in it reaches the server that contains just one middleware - a router:
<?php

// ...

$server = new Server(new Router($routes));
We need to hack into this step and authenticate the request before it reaches the router. In our case, we want to protect all routes that start with /users. If authentication fails there is no need to execute the router, we already can return a 401 response. So, it looks like the guard is the best candidate for a new middleware which will be executed in the first place. Something like this:
<?php

// ...

$auth = new Guard('/users', $authenticator);
$server = new Server([$auth, new Router($routes)]);
Now the server has two middlewares: the guard and the router. The guard is the first middleware in the chain and it means that the request has to go through the guard before it reaches the router. In this case, any controller will be executed only if the request passes the guard.
The guard system will definitely contain several classes, so let’s create a new Auth namespace in our project and create a new class Guard in it:
<?php

namespace App\Auth;

use App\Auth\Jwt\JwtAuthenticator;
use App\JsonResponse;
use Psr\Http\Message\ServerRequestInterface;

final class Guard
{
    private $routesPattern;

    private $authenticator;

    public function __construct(string $routesPattern, JwtAuthenticator $authenticator)
    {
        $this->routesPattern = $routesPattern;
        $this->authenticator = $authenticator;
    }

    public function __invoke(ServerRequestInterface $request, callable $next)
    {
        if (!$this->tryToAuthenticate($request)) {
            return JsonResponse::unauthorized();
        }

        return $next($request);

    }

    private function tryToAuthenticate(ServerRequestInterface $request): bool
    {
        $path = $request->getUri()->getPath();
        if (preg_match("~$this->routesPattern~", $path, $matches) === 0) {
            return true;
        }


        return $this->authenticator->validate($request);
    }
}
Our guard accepts a regex pattern for routes, that we want to be secure and an authenticator (which will be created next). In method tryToAuthenticate() we extract the requested path from the URI and use preg_match() to detect if it is a protected route. If the requested route is protected we delegate authentication to JwtAuthenticator. It validates (authenticates) the request. In case of a valid request, we continue chaining to the next middleware (the router) otherwise, we return 401 response.
Then we need to create an authenticator. The responsibility of the authenticator is to extract a token from HTTP headers and to validate it. To validate JWT we can just try to decode it. Successfully decoded token means a valid one.
Create a new class JwtAuthenticator in Auth namespace:
<?php

namespace App\Auth;

use Psr\Http\Message\ServerRequestInterface;
use React\Promise\PromiseInterface;

final class JwtAuthenticator
{
    private const HEADER_VALUE_PATTERN = "/Bearer\s+(.*)$/i";

    private $encoder;

    public function __construct(JwtEncoder $encoder)
    {
        $this->encoder = $encoder;
    }

    public function validate(ServerRequestInterface $request): bool
    {
        $jwt = $this->extractToken($request);
        if (empty($jwt)) {
            return false;
        }

        $payload = $this->encoder->decode($jwt);
        return $payload !== null;
    }

    private function extractToken(ServerRequestInterface $request): ?string
    {
        $authHeader = $request->getHeader('Authorization');
        if (empty($authHeader)) {
            return null;
        }

        if (preg_match(self::HEADER_VALUE_PATTERN, $authHeader[0], $matches)) {
            return $matches[1];
        }

        return null;
    }
}
Method extractToken() checks Authorization header and uses regular expression to extract a token from it. Then method validate() checks this extracted value. We use an instance of JwtEncoder (which will be created soon) to try to decode a token. If there is no Authorization header or it doesn’t contain a valid JWT, the validation fails.
JWT decoding logic has been placed into its own class because I don’t want to expose these details to JwtAuthenticator. JwtEncoder is the last class in our guard system. It is a wrapper on top of static Firebase\JWT\JWT class from the package firebase/php-jwt. JwtEncoder encapsulates the encryption key and handles JWT decoding:
<?php

namespace App\Auth;

use Firebase\JWT\JWT;

final class JwtEncoder
{
    private $key;

    public function __construct(string $key)
    {
        $this->key = $key;
    }

    public function decode(string $jwt): array
    {
        $decoded = JWT::decode($jwt, $this->key, ['HS256']);
        return (array)$decoded;
    }
}
The class contains only decoding, but for now, it’s enough. Later we will an authentication endpoint, where we will create (encode) a token.
Now, we can try to put everything together and protect our RESTful API. Open the main script and instantiate the building blocks of our guard:
<?php

// ...

$authenticator = new JwtAuthenticator(new JwtEncoder('secret'));
$auth = new Guard('/users', $authenticator);

$server = new Server([$auth, new Router($routes)]);
We create JwtEncoder with a private key secret. Then use this encoder to create an instance of JwtAuthenticator. And the last step is to create a Guard. We protect all routes that start with /users with our JwtAuthenticator. Now let’s try to send a request to one of the protected routes:

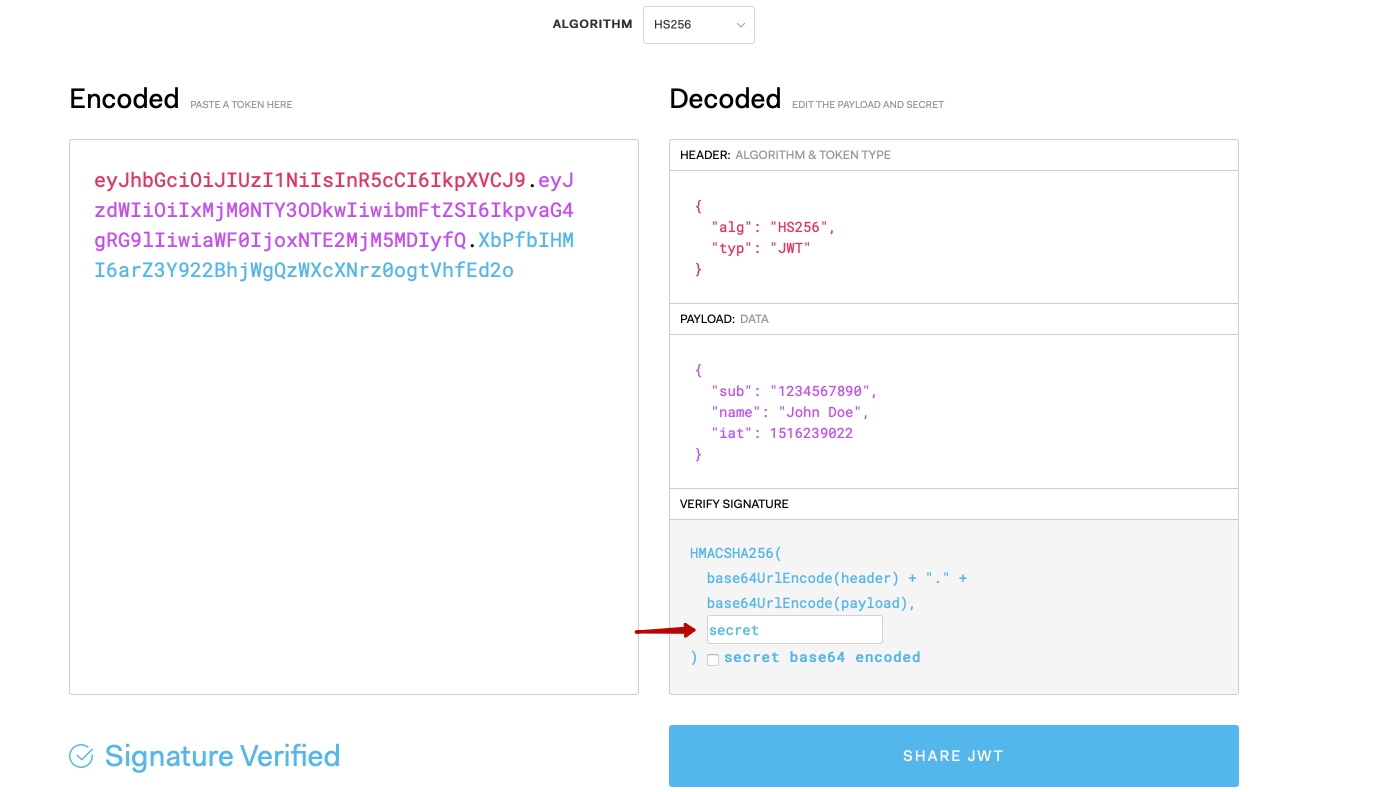
Without a provided token, we receive 401 response. At least the protection part of guard works. But where we can get a valid token to test the success part? You can generate one on jwt.io.

The only thing you need to do is to provide our private key secret. Then copy the value from “Encoded” field and use it with Authorization: Bearer ... header. With a valid token the server now returns a 200 response:

Creating a Token
Let’s make our POST http://127.0.0.1:8080/authenticate route where we will accept an email and return a token for this user.
I skip a password here for simplicity. Of course, you should never allow to authenticate your users without passwords.
Create a new controller-middleware App\Controller\Login:
namespace App\Controller;

use App\Auth\JwtAuthenticator;
use App\JsonResponse;
use App\UserNotFoundError;
use Psr\Http\Message\ServerRequestInterface;

final class Login
{
    private $authenticator;

    public function __construct(JwtAuthenticator $authenticator)
    {
        $this->authenticator = $authenticator;
    }

    public function __invoke(ServerRequestInterface $request)
    {
        $email = $this->extractEmail($request);
        if ($email === null) {
            return JsonResponse::badRequest("Field 'email' is required");
        }

        $this->authenticator->authenticate($email)
            ->then(function (string $token) {
                    return JsonResponse::ok(['token' => $token]);
                },
                function (UserNotFoundError $error) {
                    return JsonResponse::unauthorized();
                });
    }

    private function extractEmail(ServerRequestInterface $request): ?string
    {
        $params = json_decode((string)$request->getBody(), true);

        return $params['email'] ?? '';
    }
}
It depends on JwtAuthenticator and actually delegates authentication to it. The controller just handles the request/response part. It extracts an email from the request and tries to authenticate a user. If authentication fails we return 401 response. Otherwise, we return a JSON object with a newly created token.
Currently, the authenticator doesn’t have a method called authenticate(), so we need to create one:
<?php

namespace App\Auth;

// ...

final class JwtAuthenticator
{
    // ...

    public function authenticate(string $email): PromiseInterface
    {
        // ...
    }
}
The idea is the following: we accept an email, then we ask the Users object if there is a user with a provided email. If such user exists we create a token and return the id of this user as a payload. Otherwise, we throw an exception.
Before we continue we need to update class Users and add a method for retrieving a user by an email:
<?php

namespace App;

use React\MySQL\ConnectionInterface;
use React\MySQL\QueryResult;
use React\Promise\PromiseInterface;

final class Users
{
    // ...

    public function findByEmail(string $email): PromiseInterface
    {
        return $this->db->query('SELECT id, name, email FROM users WHERE email = ?', [$email])
            ->then(function (QueryResult $result) {
                if (empty($result->resultRows)) {
                    throw new UserNotFoundError();
                }

                return $result->resultRows[0];
            });
    }

}
The method returns a promise that resolves with an array of user data. If there is no user for a provided email the promise rejects with UserNotFoundError. Done, Users class is ready and we can continue with JwtAuthenticator. Update the constructor and add a dependency for Users:
<?php

namespace App\Auth;

// ...

final class JwtAuthenticator
{
    private $encoder;
    private $users;

    public function __construct(JwtEncoder $encoder, Users $users)
    {
        $this->encoder = $encoder;
        $this->users = $users;
    }

    // ...

    public function authenticate(string $email): PromiseInterface
    {
        return $this->users->findByEmail($email)
            ->then(
                function (array $user) {
                    return $this->encoder->encode(['id' => $user['id']]);
                },
                function (Exception $exception) {
                    throw $exception;
                }
            );
    }
}
Inside authenticate() method we fetch a user from the database. If the user exists we create a new token, otherwise the promise rejects. You remember that class JwtEncoder has only decoding logic. It’s time to add a new method for JWT creation:
<?php

namespace App\Auth;

use Firebase\JWT\JWT;

final class JwtEncoder
{
    // ...

    public function encode(array $payload): string
    {
        return JWT::encode($payload, $this->key);
    }

    // ...
}
This method wraps a call of JWT::encode() and uses our own private key to create a token. And we are done. Now we can add a new route to our server. First of all, update the constructor of JwtAuthenticator, it requires an instance of Users:
<?php

// ...
$authenticator = new JwtAuthenticator(new JwtEncoder('secret'), $users);
Then, add a new route to the routes collection:
<?php

// ...

$routes = new RouteCollector(new Std(), new GroupCountBased());

// ...

$routes->post('/login', new Login($authenticator));
Restart the server and try to login using an email of one of our users:

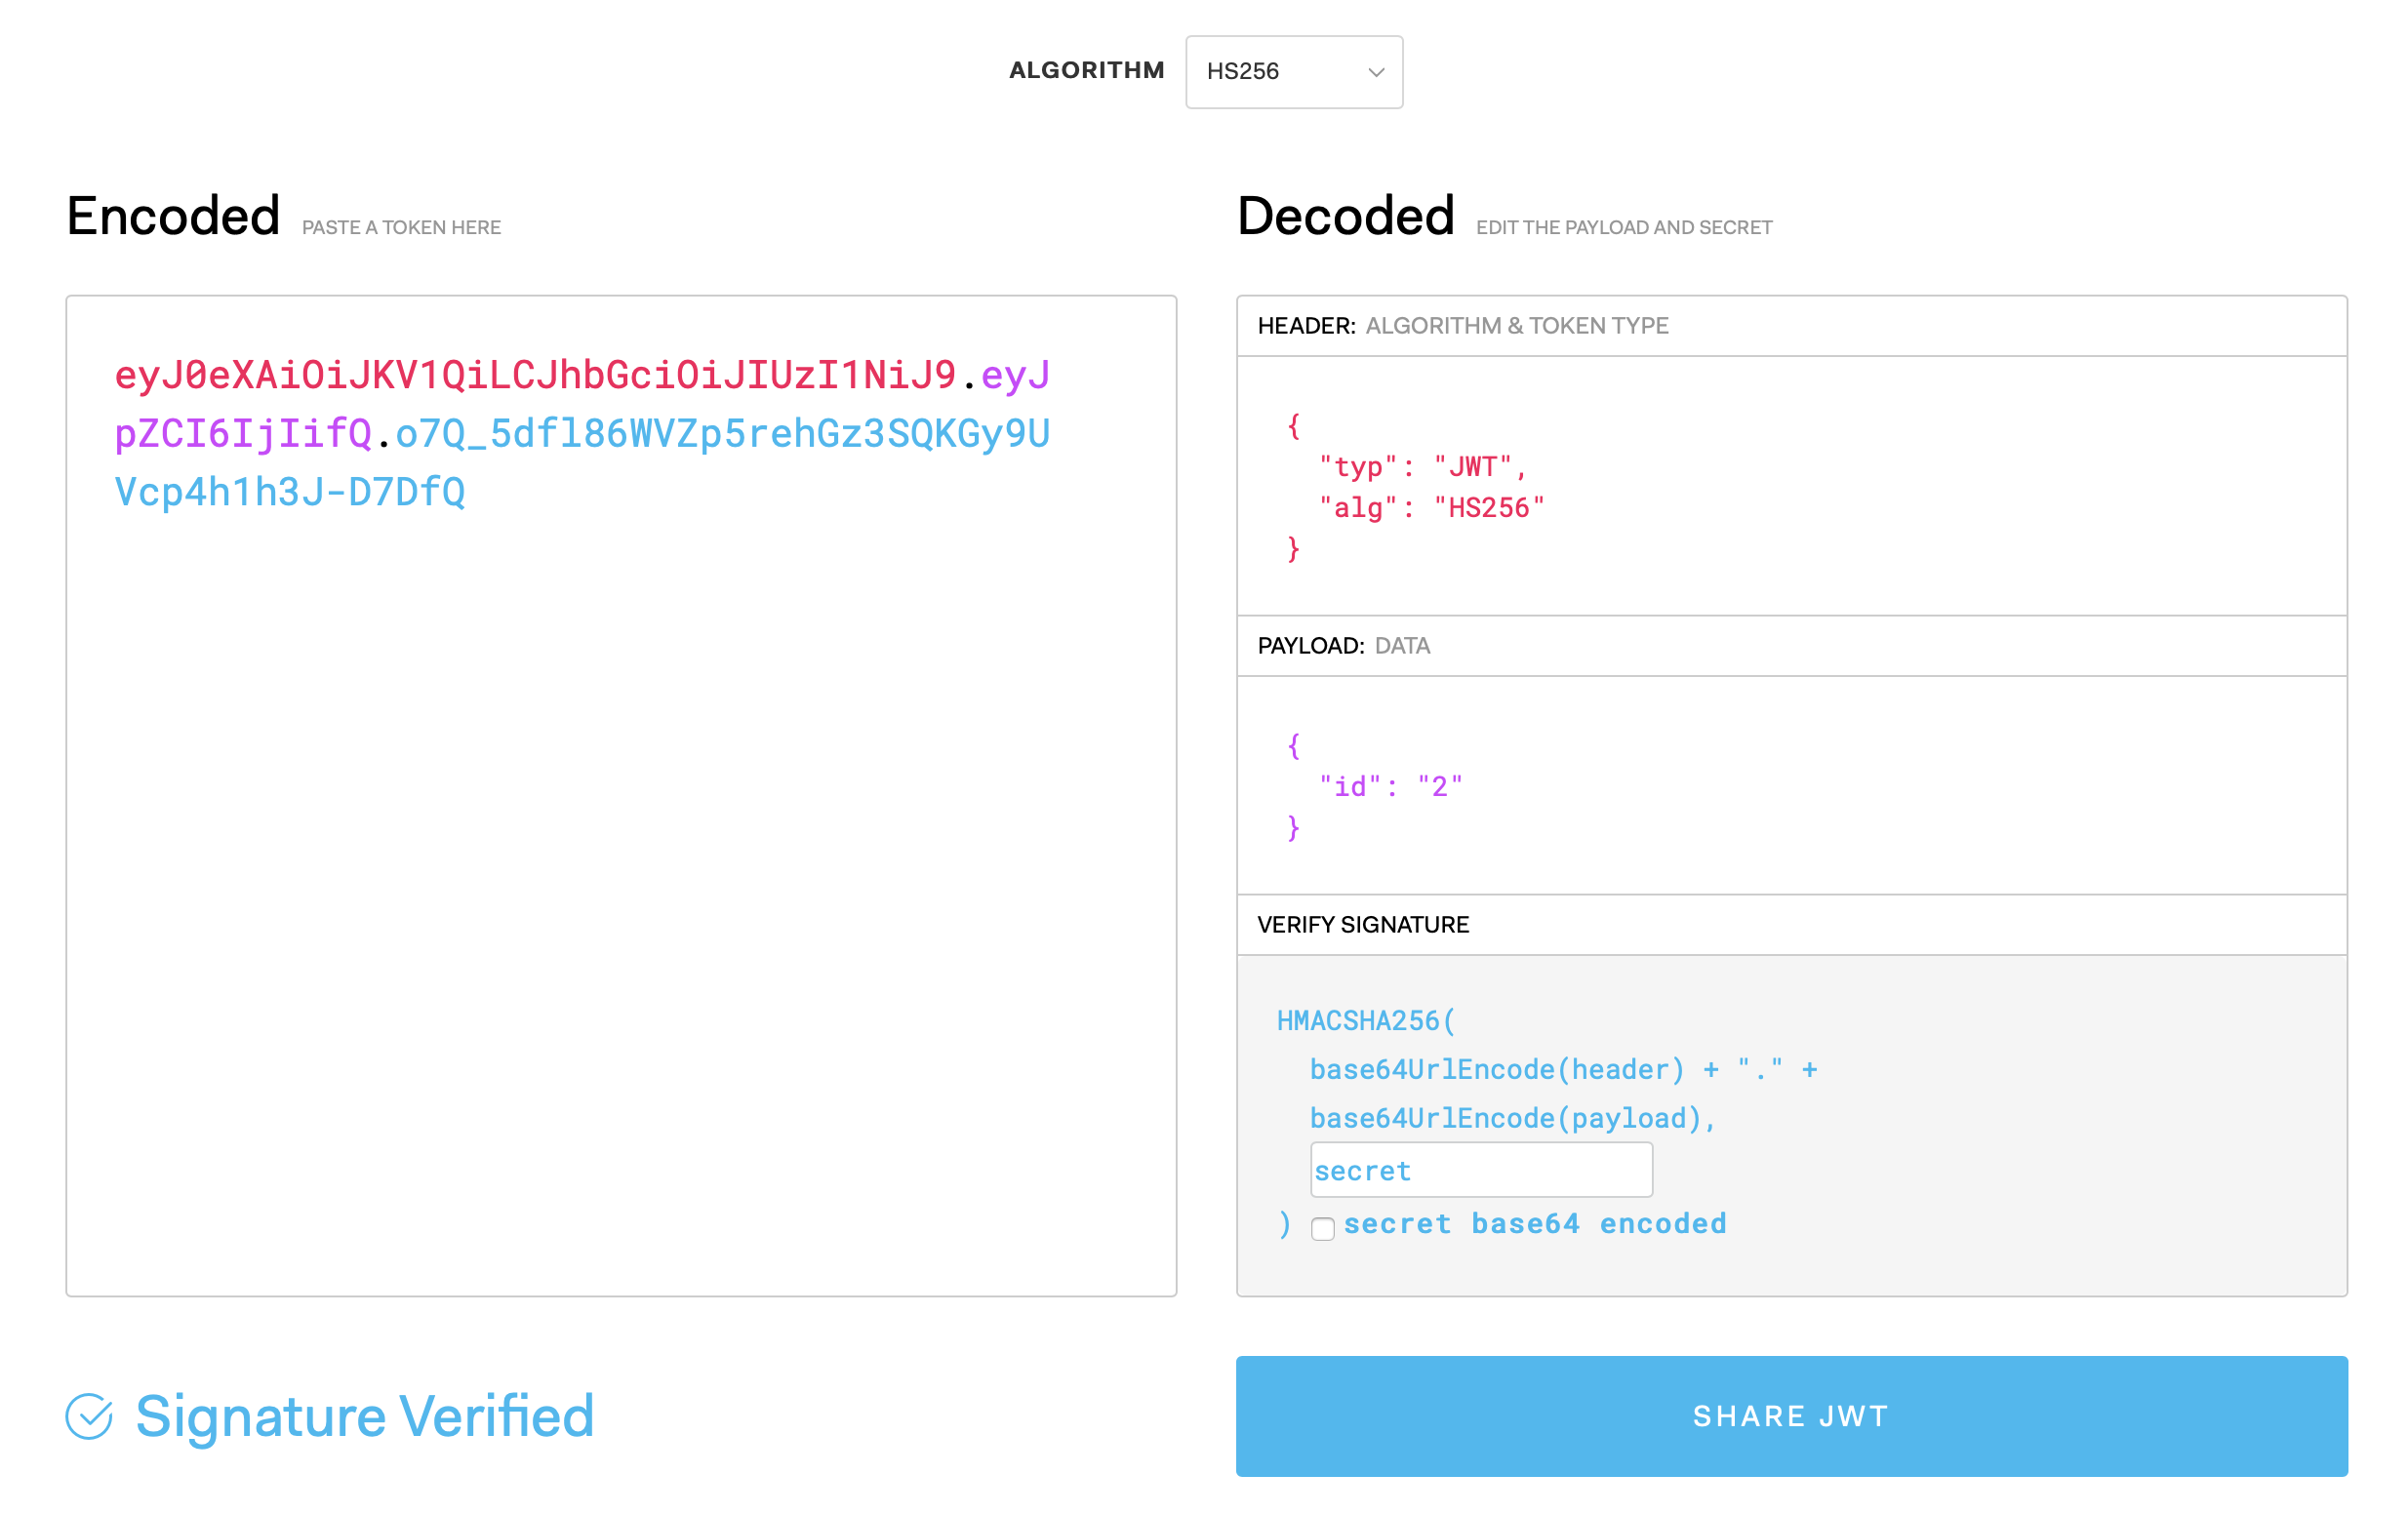
The response contains a token that we can use further to request protected routes. We can try to decode this token on jwt.io and see its contents:

Once the user has the token, they can store it client side and pass it with every request and the server will validate that token using Guard middleware.
This is a quick look at how we can protect routes and our Node API using JSON Web Tokens. This can be expanded into a much larger scoped project like providing permission specific tokens and creating a more robust and feature filled API.
Conclusion
This is a good look at how we can protect routes and our RESTful API using JWT. I hope this look has given you a good understanding of how we can hook into ReactPHP server and protect some routes with a guard-middleware. As a recap, we’ve learned:
- How to protect certain routes in our RESTful API.
- How to create and verify JWT.
You can find examples from this article on GitHub.
This article is a part of the ReactPHP Series.